Creating a new checklist

You don't have to add checklists only from templates. You can create your own completely new checklist,
which has no predefined tasks.
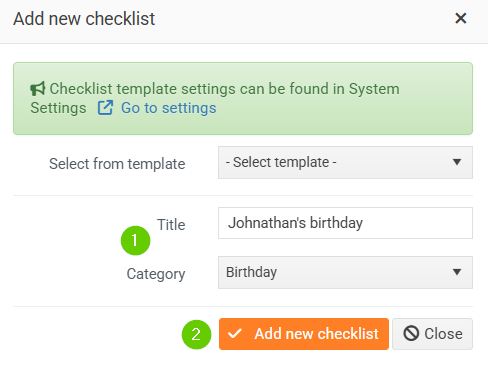
To create a new checklist, click on Add new checklist in the Checklists section of the employee's profile, then enter a name and select a category (1) for your checklist. Save by clicking the Add new checklist button (2) .
After saving, you can add individual tasks to the checklist by clicking Add new task .

The task detail form will open:
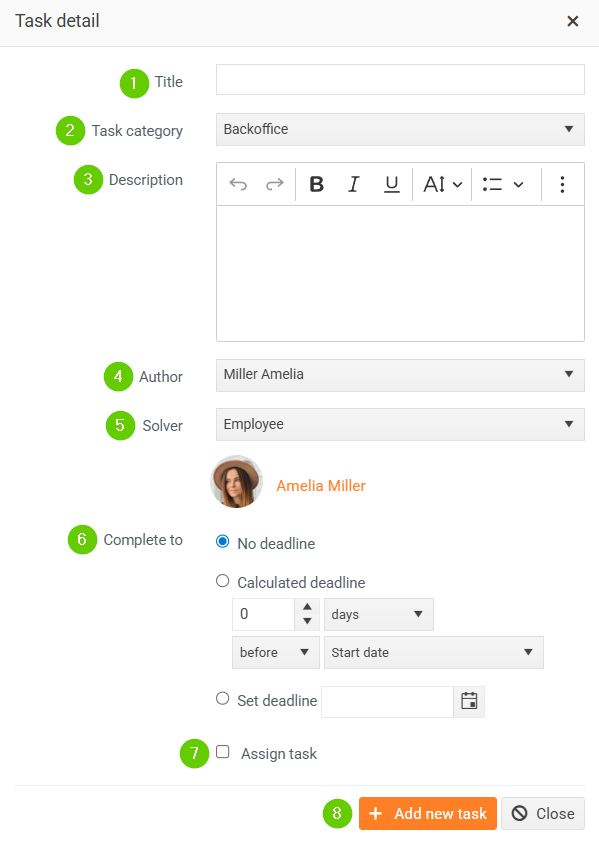
- Enter a name .
- Select a task category . If you have permissions, you can manage individual categories in Settings > Checklist Templates > Checklist Categories.
- You can enter a description for the task.
- The author is automatically pre-filled by the task submitter.
- Select a resolver . You don't have to specifically name the resolver, you can select a person by role – supervisor or approver. The system will assign the right person.
- Finish by - you have 3 options to choose from:
- No deadline - the task does not have a set completion date.
- Calculated date - you can enter a calculated date = X days/weeks/months before or after a certain date that we obtain from the employee's profile - for example, the date of joining or birth.
- Fixed deadline - enter a specific date by which the task must be completed.
- Checkbox Assign task - if you check this checkbox, the task will be automatically assigned to the solver after saving.
- Save using the Add New Task button.
After saving, the newly created task will appear in the task list. If you activated the Assign task checkbox, the task was automatically assigned to the solver. You can recognize it by the fact that it is marked in yellow and has the status Incomplete .
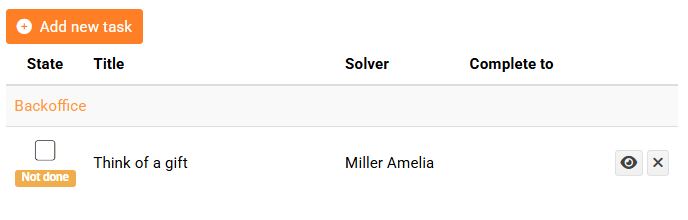
In the opposite case, i.e. if you left the Assign task checkbox empty, the task is marked in red and has the status Not assigned, i.e. the task has not yet been assigned to the solver.
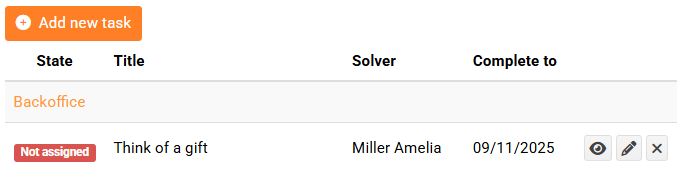
If you want to assign such a task to a solver, click the Select and assign task button in the yellow box above. Check the tasks you want to assign and confirm.
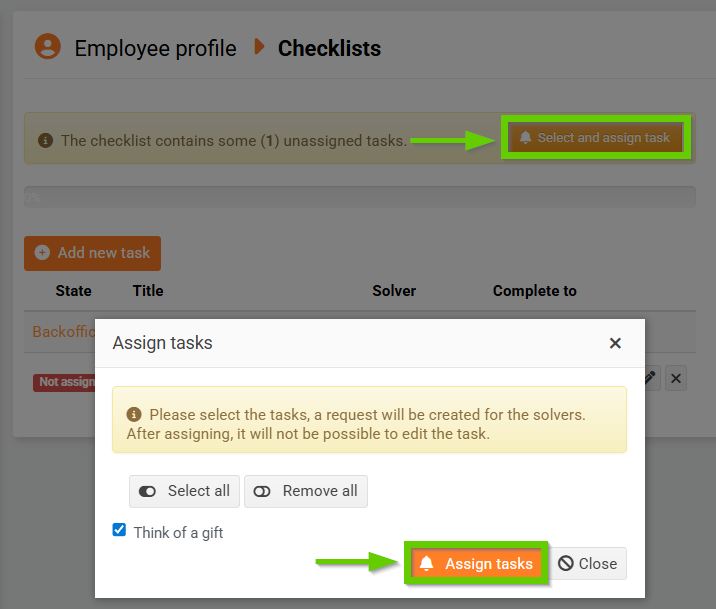
The system will automatically assign the task to the solver and send them a notification.
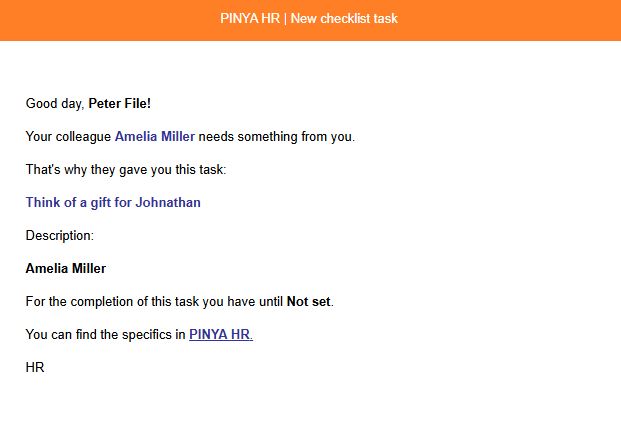
At the same time, a new request will be created for them.
The task is now marked yellow and has a status of Incomplete .