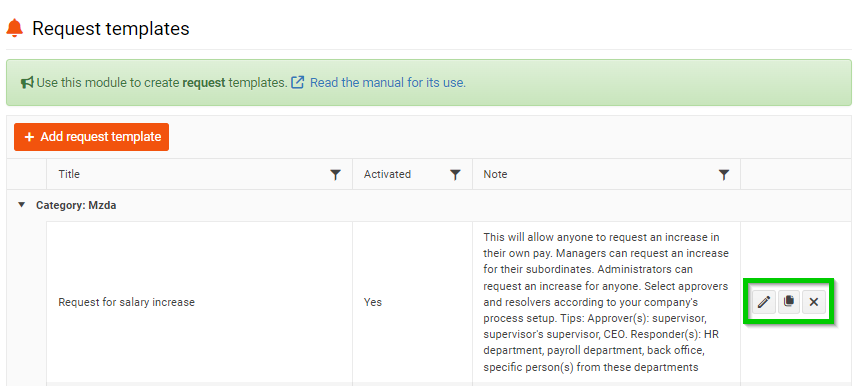
Request templates

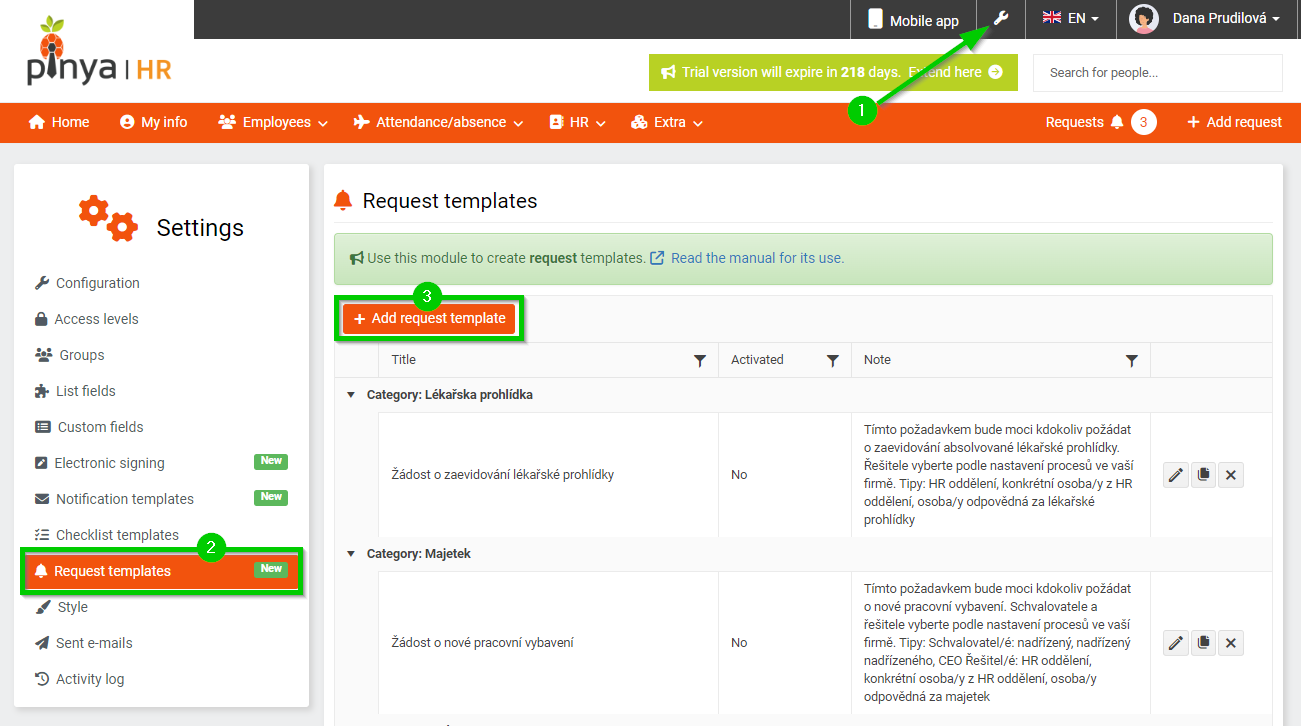
You can find an overview of all created request templates in Settings > Request templates .
To create a new template, click the Add request template button.
This will open a form that consists of several parts:
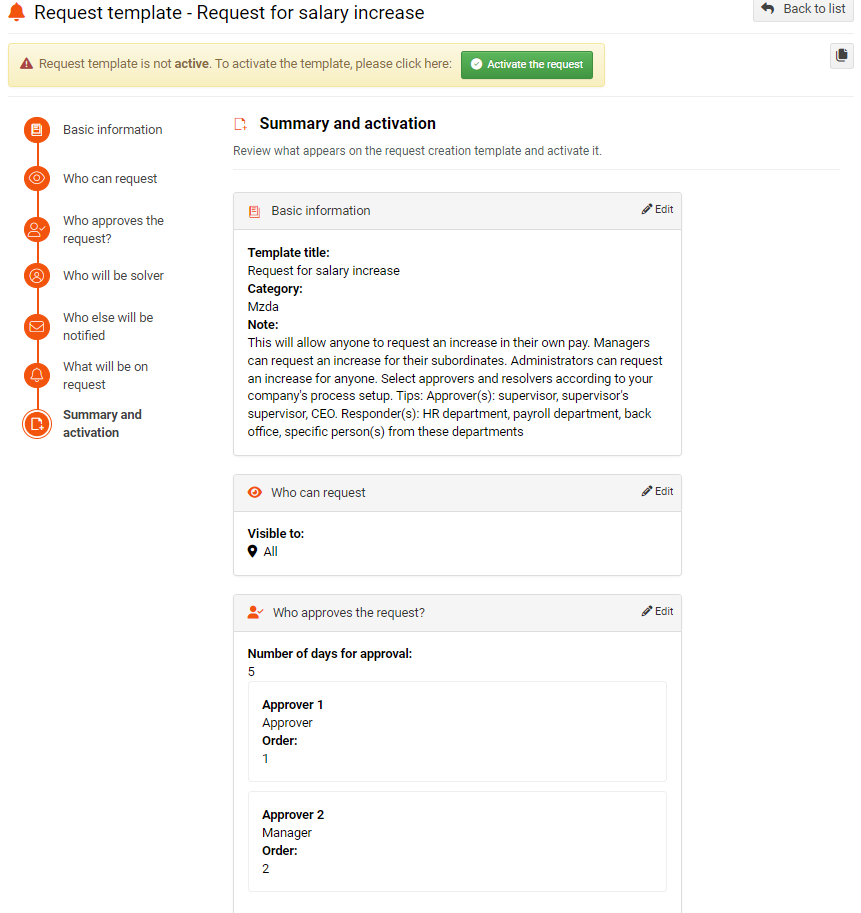
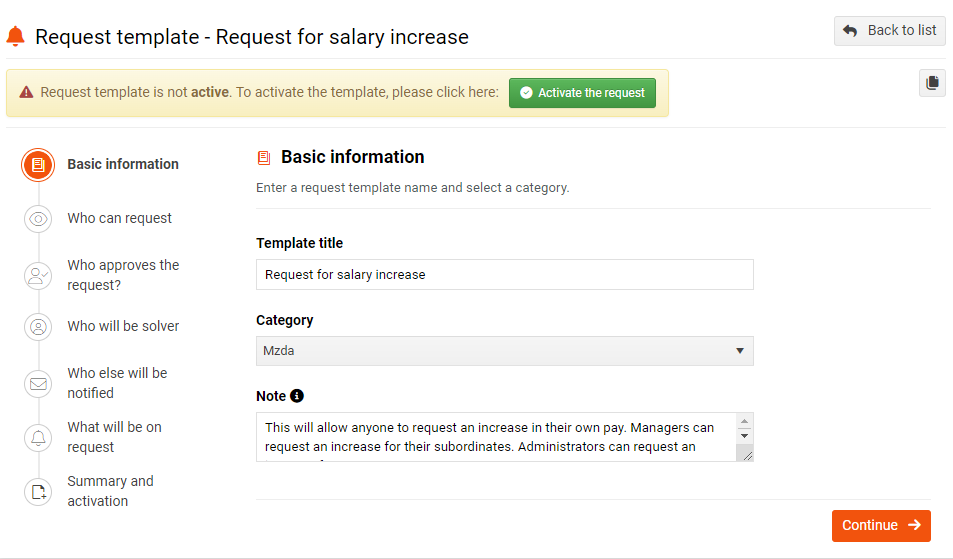
1. Basic information
- Template title - give the request template an appropriate name, as it indicates what the request is about. Its name will be offered when creating a new request and you will also see it in all email notifications.
- Category - select the category to which the new template will fall. You can add and manage categories in the List fields section, if you have permission to do it. You can find more detailed information about them in the List fields article.
- Note - here you can write basic information about the template. The note only appears in the configuration.
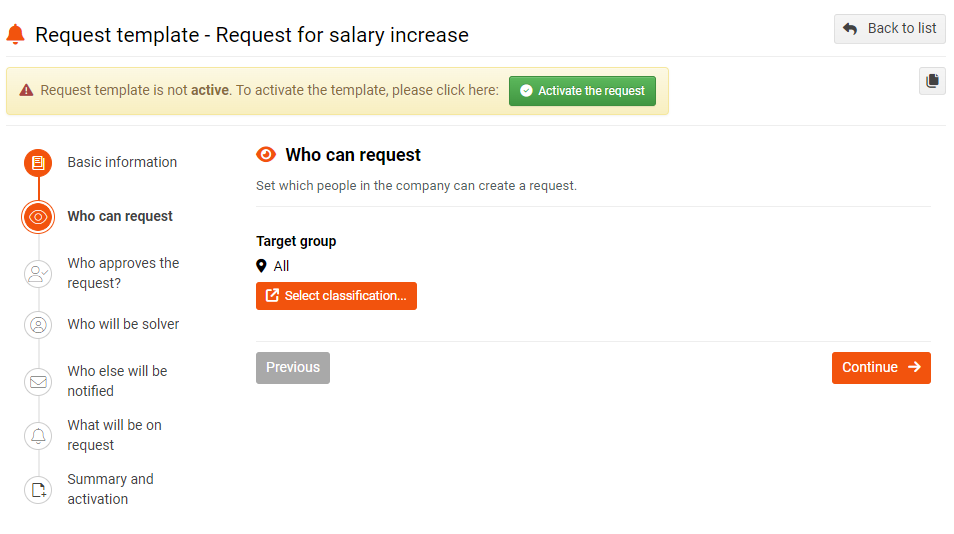
2. Who can request
- Target group - select to whom the request will be offered as one of those they can apply for.
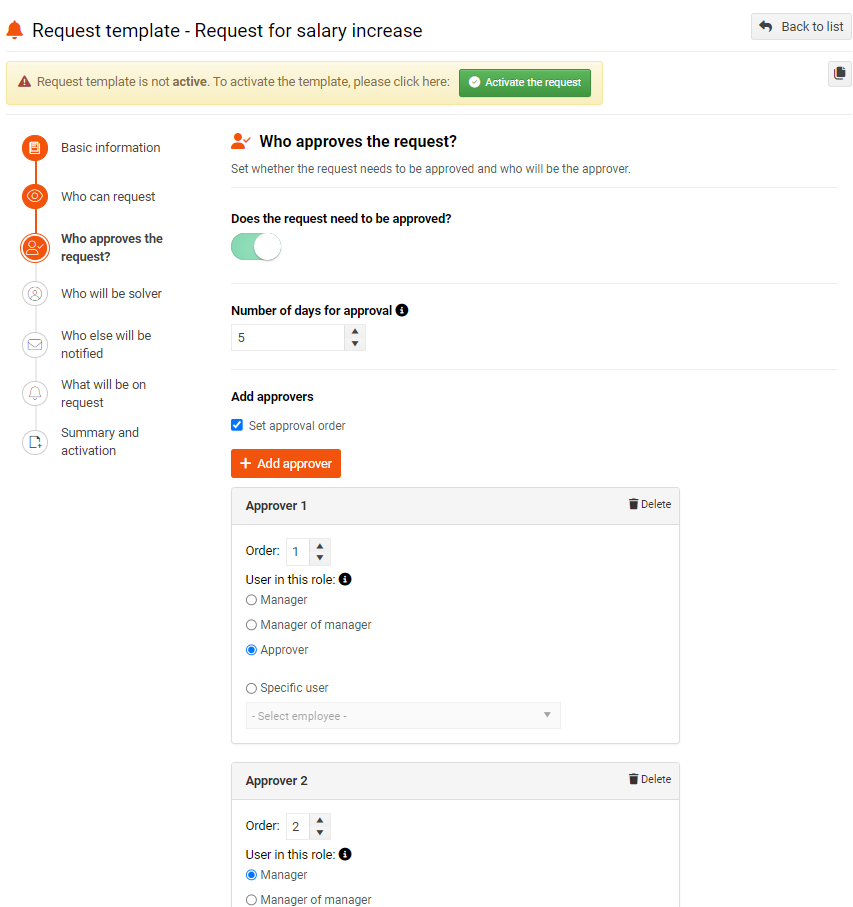
3. Who approves the request?
- Does the request need to be approved? - the switch is off by default. If the request needs to be approved, turn the switch on (lit in green). Turning on the switch activates the related fields:
a) Number of days for approval - from the day the approver receives a request for approval. It is set to 5 days by default. If you set it to 0, it means that the approval has no deadline.
b) Add approvers - here you can choose if the approver will be a manager, a manager of manager or an approver. This is always in relation to the employee concerned, i.e. the person to whom the request relates. The approver can also be a specific user you select from the menu. There can be an unlimited number of approvers.
c) Set approval order - if you check this checkbox, you will see an option for each approver to specify the order in which they should approve the request. If you don't check the checkbox, the approval process runs in parallel and the individual approvers approve independently of each other.
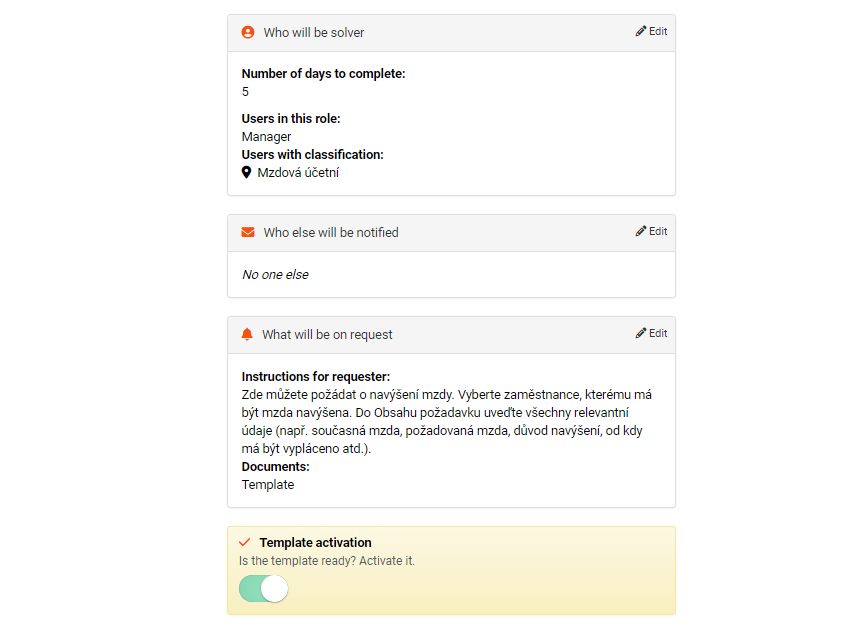
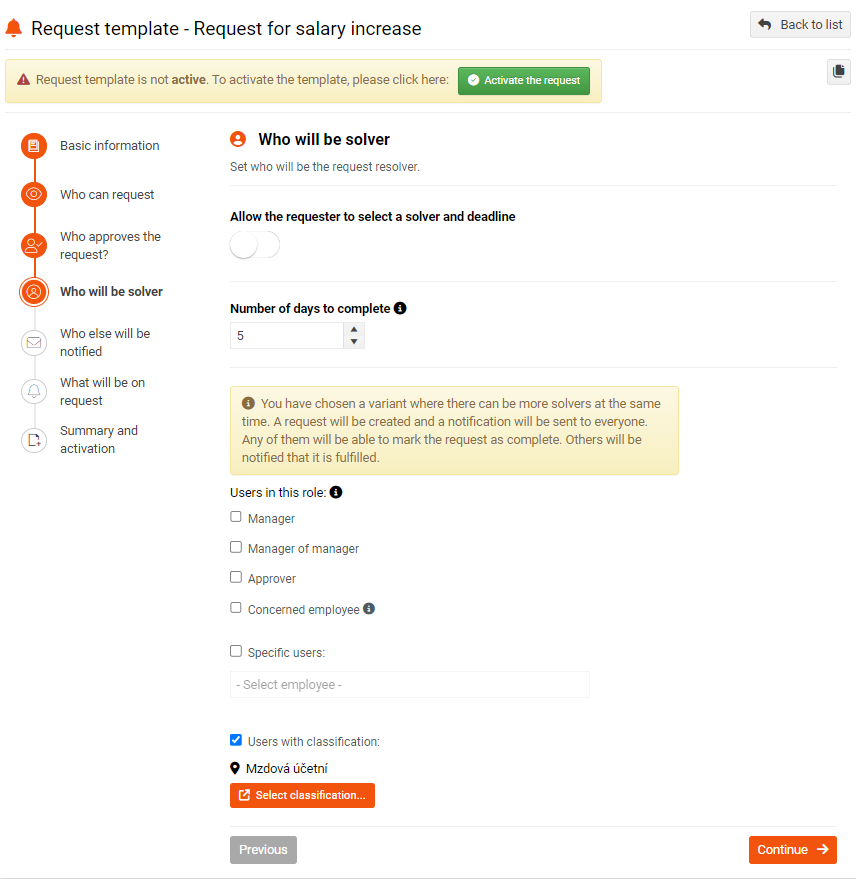
4. Who will be the solver
- Allow the requester to select a solver and deadline - the switch is off by default. If you select this option, the applicant will be able to specify any solver on the request.
- Number of days to complete - from the day the solver receives the request for processing. It is set to 5 days by default.
- User in this role - here you can choose whether the solver will be a manager, a manager of manager, an approver or the concerned employee. The solver can also be specific people that you select from the menu.
- Users with classification - here you can select a solver according to targeting.
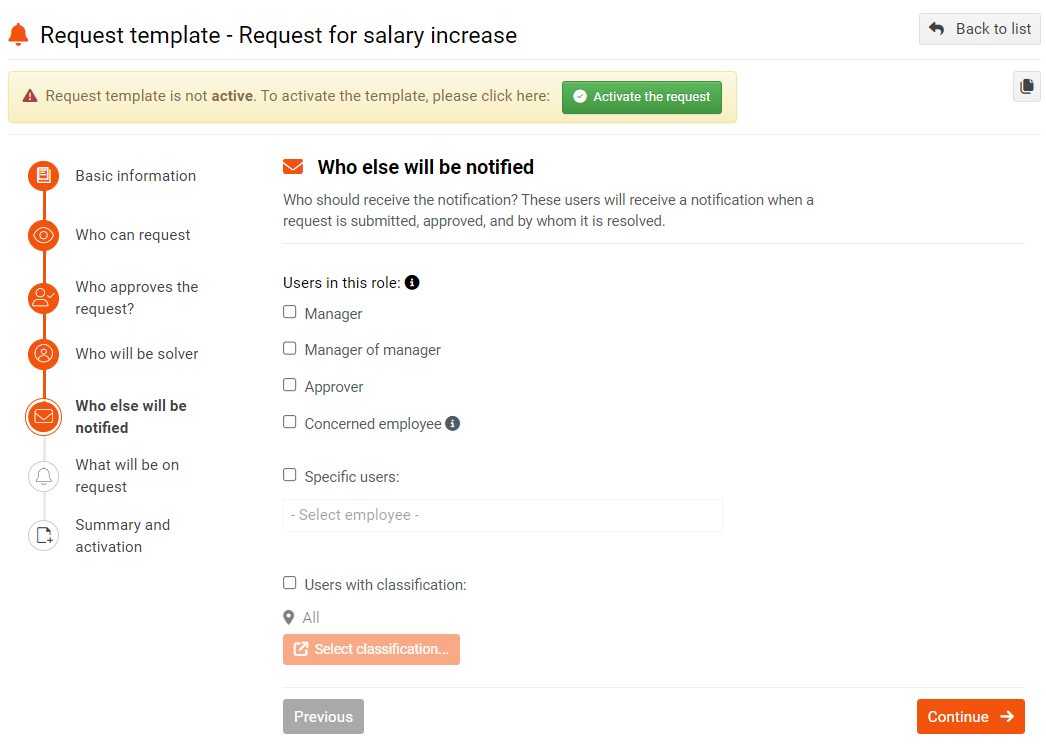
5. Who else will be notified
Selected users will be notified that the request is submitted, approved/rejected, resolved, canceled and by whom.
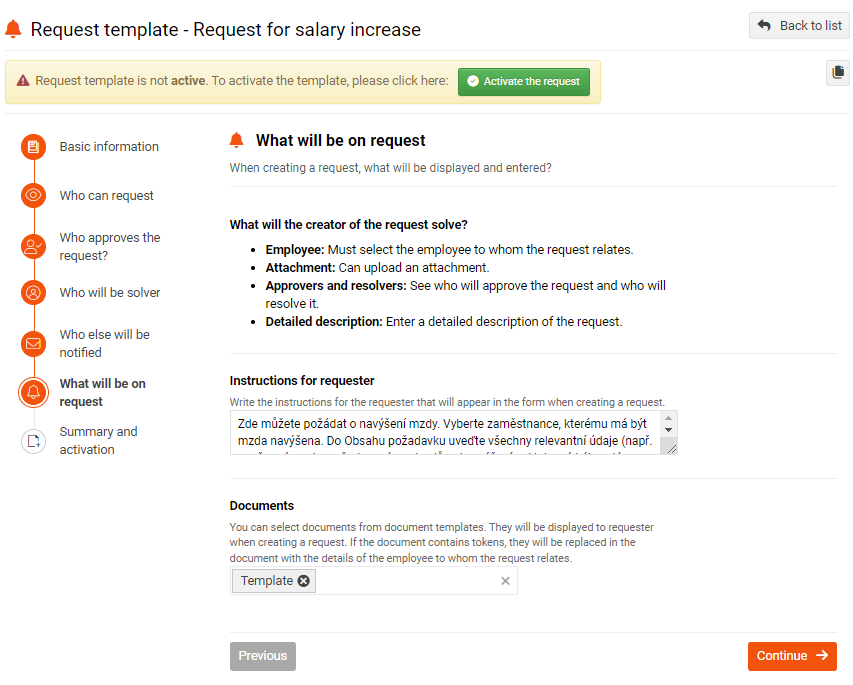
6. What will be on request
- Instructions for requester - insert instructions for applicants here. These instructions will appear on the form when you submit a new application.
- Documents - you can select documents from templates in the documents field. They will be displayed to applicants when creating a request. The applicant can download them and then fill in and upload them. If the document contains tokens, they will be replaced in the document with the data of the employee concerned by the request.
7. Summary and activation
Here you can see a summary of the entire template. If you want to edit any of the sections, click on the pencil icon. If everything is fine, you can activate the template using the switch and save the template using the Add request template button.
You can just save the template in progress and leave it inactive. Inactive templates are not offered for request creation.