Adding a checklist from a template

To add a checklist from a template that already has predefined tasks, possibly deadlines and solvers,
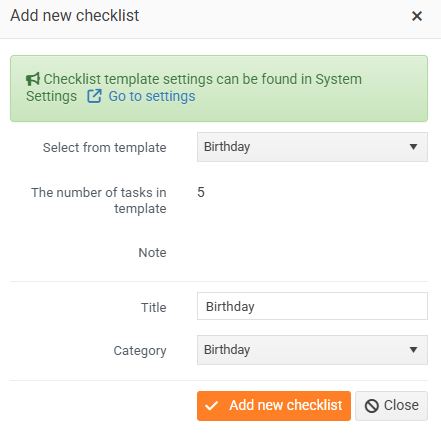
click on the employee's profile in the Checklists section, click Add new checklist , and then from the menu
select the desired template . To make sure you are selecting the correct template, you will be shown a description of the template note
and the number of tasks in it. The Category field is filled in automatically according to the template. Name the checklist and save it .
After saving, a list of pre-prepared tasks will be displayed. Tasks can also have predefined completion dates and solvers. All tasks are red and have the status Not assigned , i.e. the task has not yet been assigned to a solver.

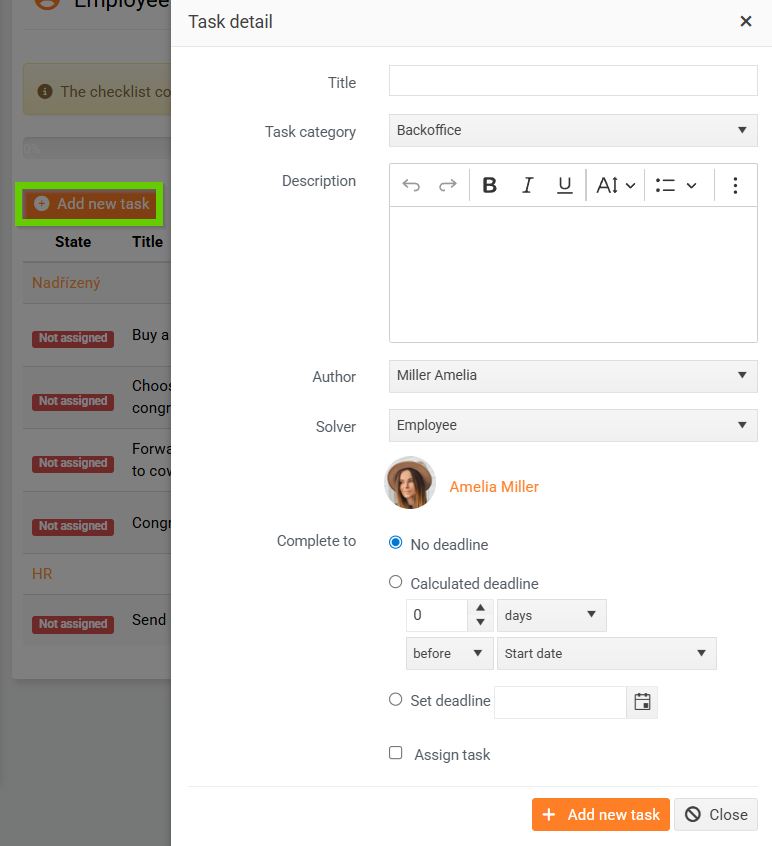
If you need to add any more tasks to the list, use the Add new task button. A form will open, which you can fill out and save.
Then check that all tasks have a solver . For some tasks from templates, the solver cannot be defined in advance. In this case, click the pencil icon and add the solver.

Then click the Select and assign task button in the yellow box above. Check the tasks you want to enter and confirm.
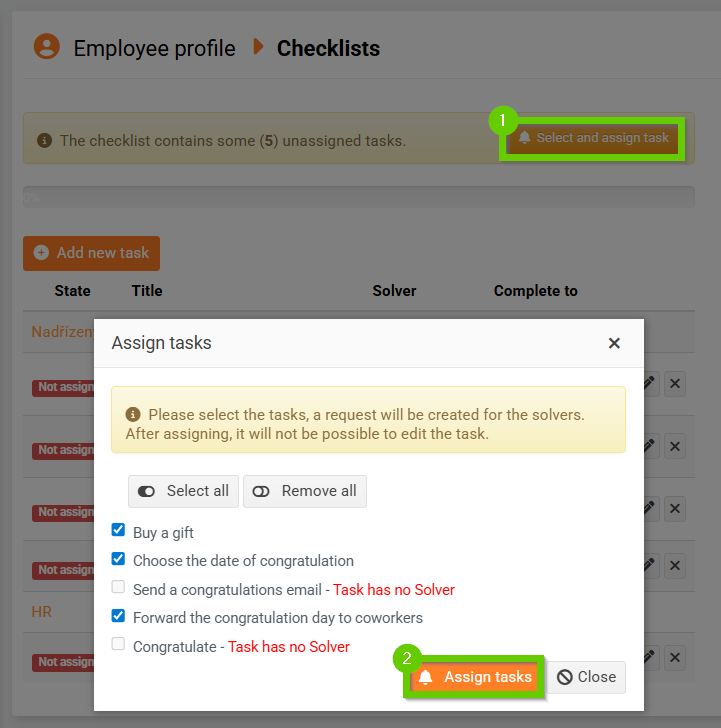
The system will automatically assign tasks to solvers and send them a notification. At the same time, a new request will be created for them.
The tasks are now marked yellow and have a status of Incomplete .