Account level
Each employee can have a different account level and associated permissions in PINYA HR.
To set up your company's account levels, you need to go to the main system settings.
You can get to the main settings by clicking on the key logo in the upper right corner of the page.
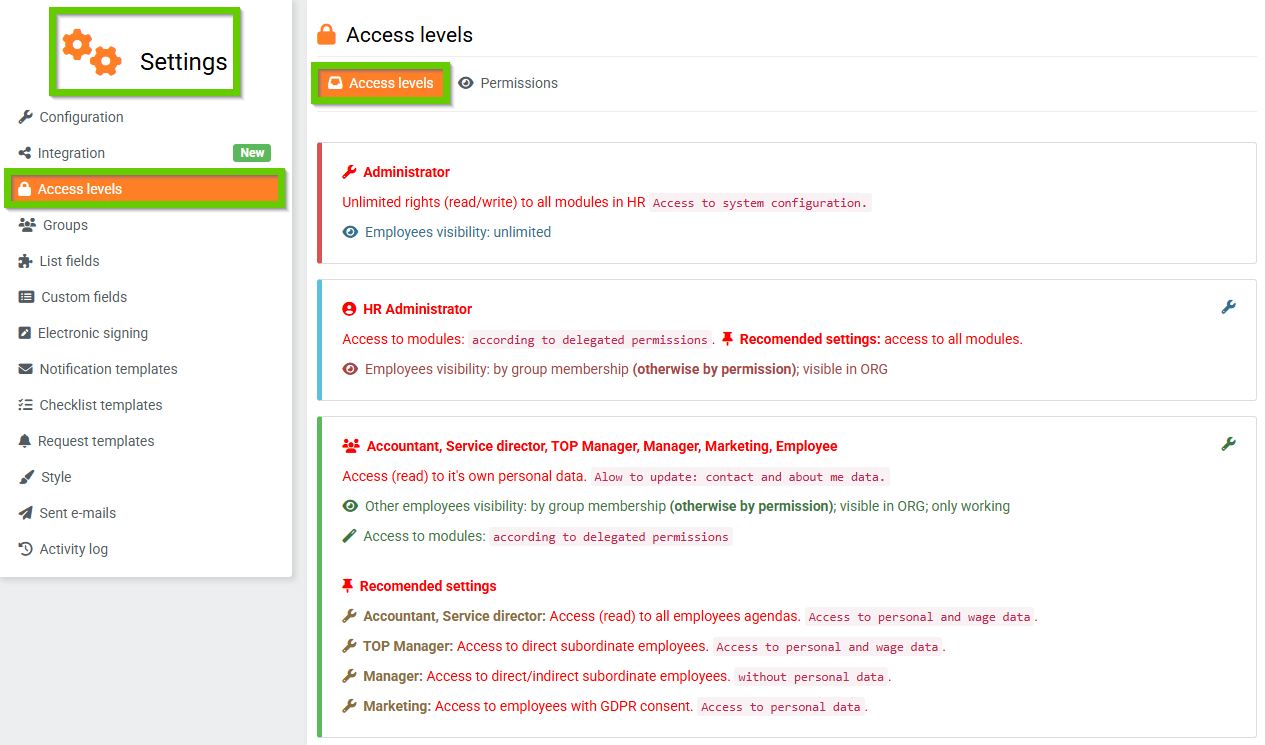
In the settings, go to the Access levels section.

1 – To set your account levels, go to the main settings to the “Access Levels” tab.
2 – In the "Access levels" panel, you can find the recommended settings for individual job positions.
3 – Recommended access settings for individual job positions.
On the Access levels tab, you can see the permission proposal as well as its default settings. You can edit the permissions as you see fit on the Permissions tab. Choose the job's account level and set its permissions by clicking on the colored sliders. If the slider is colored, that permission is active.

4 – You set the permissions in the "Permissions" panel.
5 – Choose the work position (previously set in the dial entries, instructions here ) for which you want to set the authorization.
6 – If you want to set permissions for a specific group of employees, you can do so by selecting the group in this panel. (set up the groups according to the instructions here )
7 – A colored box indicates that the given employee has been granted permission to display himself in the organizational structure.
8 – A white box means that the given employee has not been granted permission to edit the organizational structure.
Combination of module authorization with employee detail authorization

The level has permission to enter the module (e.g. Training) and can only see those employees whose details they have access to (e.g. only their direct reports).
After saving the changes, you can set the account level for individual employees. Go to that employee's profile and choose a preset account level in the Account Settings form.
After saving the changes, the employee will only have the permissions that were set in the main access levels setting.

Example:
- Your requirement is that the rank-and-file employee has different permissions than the employee from the marketing department.
- Go to the Access levels tab in the main settings.
- Click the Permissions section and select the account level for which you want to set permissions. In this case, the account level is Regular Employee.
- Set the required permissions for individual functions so that the field you want to activate is always highlighted in color. Save changes.
- If you want a marketing employee to have the same rights as a regular employee, but also to have the ability to add training, choose the Marketing Department account level.
- Click on the sliders next to the training function so that they turn color. Save changes.
- An ordinary employee thus has the same rights as an employee from the marketing department, except for the ability to add training, which only a marketing employee has.
