Creating a new regulation

To create a new internal regulation, click the Add internal regulation button and proceed as follows:
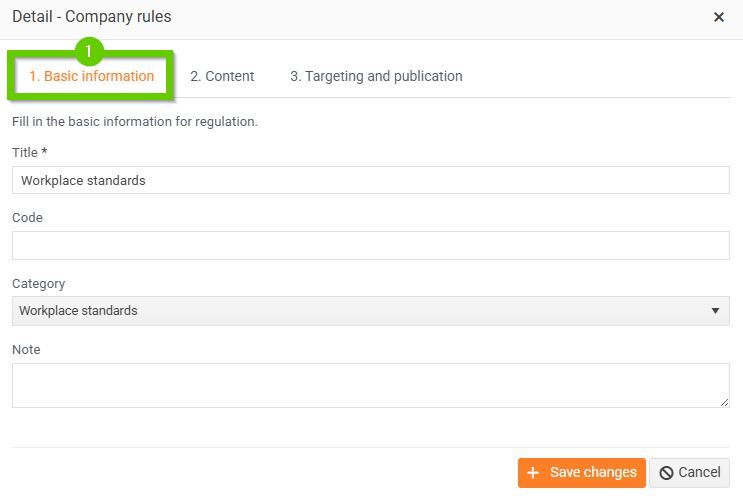
- On the Basic Data tab, fill in the following:
- Enter a name (this field is required).
- Enter the code.
- Select a category. You can manage categories in Settings > Code list items > Internal regulation categories code list.
- Optionally, add a note.
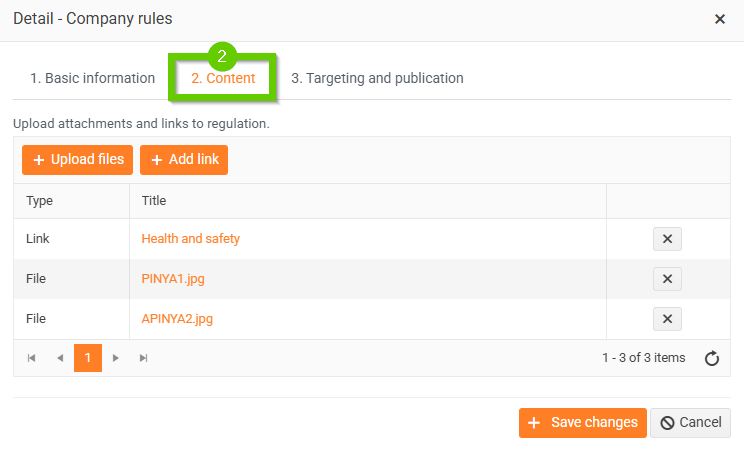
- On the Content tab, you can do the following:
- Upload files - you can upload one or more attachments in .PDF, .MP4, .PNG, .JPG, .JPEG, .GIF format. The maximum size is 500 MB.
- Add link - you can add one or more links to the content.
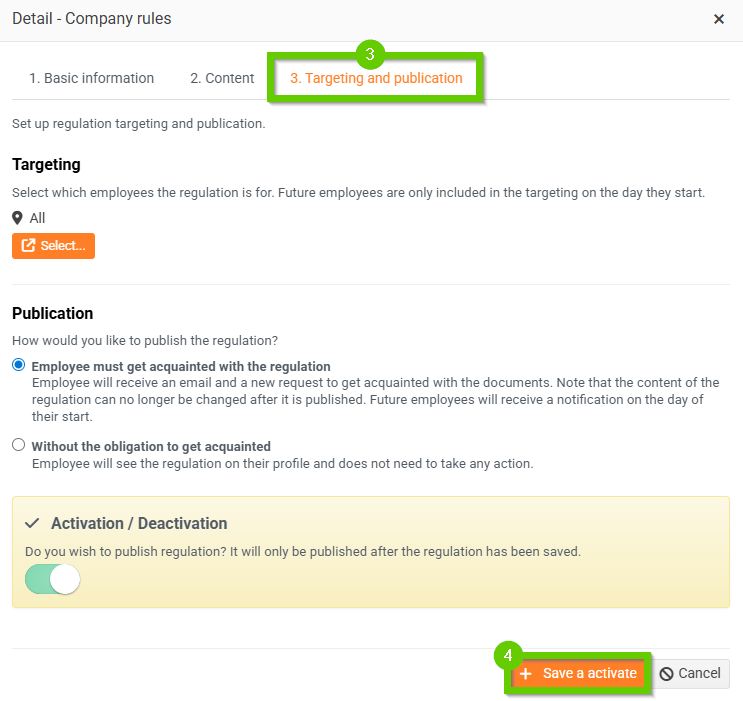
- On the Targeting and Publishing tab, you can do the following:
- Select Targeting - by default it is set to all.
Future employees will only be included in the targeting on the day of joining.- Choose how you want to publish the regulation - whether the employee must familiarize themselves with the regulation or whether they are not required to familiarize themselves with it.
- Activation / Deactivation - if the switch is active (green), then after saving the regulation, it will be automatically published, i.e. activated. If you do not turn it on, the newly created regulation will not be published, it will only be saved in the Ready to activate state. In the case of an already published regulation, turning off the switch deactivates the regulation. A deactivated regulationcannot be reactivated.
- Click the Save and Activate button.
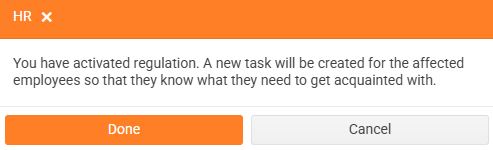
- A warning will appear. If you really want to publish the regulation, confirm the warning.
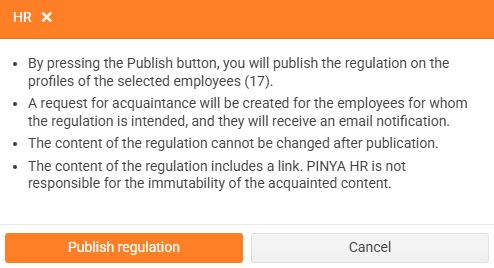
If you selected the option when publishing that the employee is not required to familiarize themselves with the regulation, the notification will ask you whether you want to inform the employee about the publication of the new regulation or not.
- You will see a notification after the regulation has been successfully published.
After the publication of an internal regulation, the affected employees who are required to familiarize themselves with the regulation will automatically receive an email notification and a new requirement will be created for them at the same time.