View management

You can encounter view management in many places in the Pinya HR application.
This feature allows you to customize the display of data in lists to your needs – you can choose
which information (columns) you want to display, thus making it easier to navigate and work with data.
A set of displayed data is called a view.
You can set up custom views, for example, above the list of employees or applicants, in the employee evaluation overview, and in other places in the application where you work with data lists.
In the article you will find information about:
- Creating a custom view
- Modifying an existing view
- Deleting a view
- Permissions for custom list view
In this article, we will show you how to create your own view and how to work with it on a specific example - over a list of employees.
1. Creating a custom view
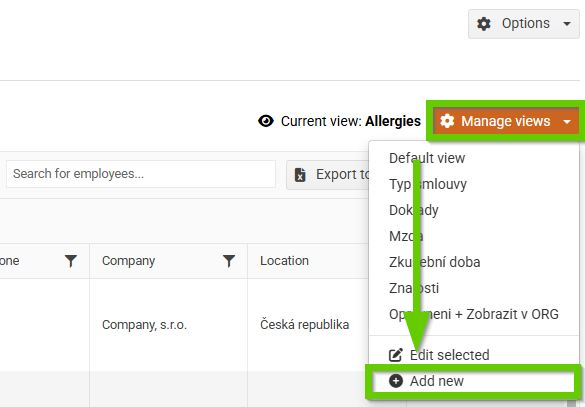
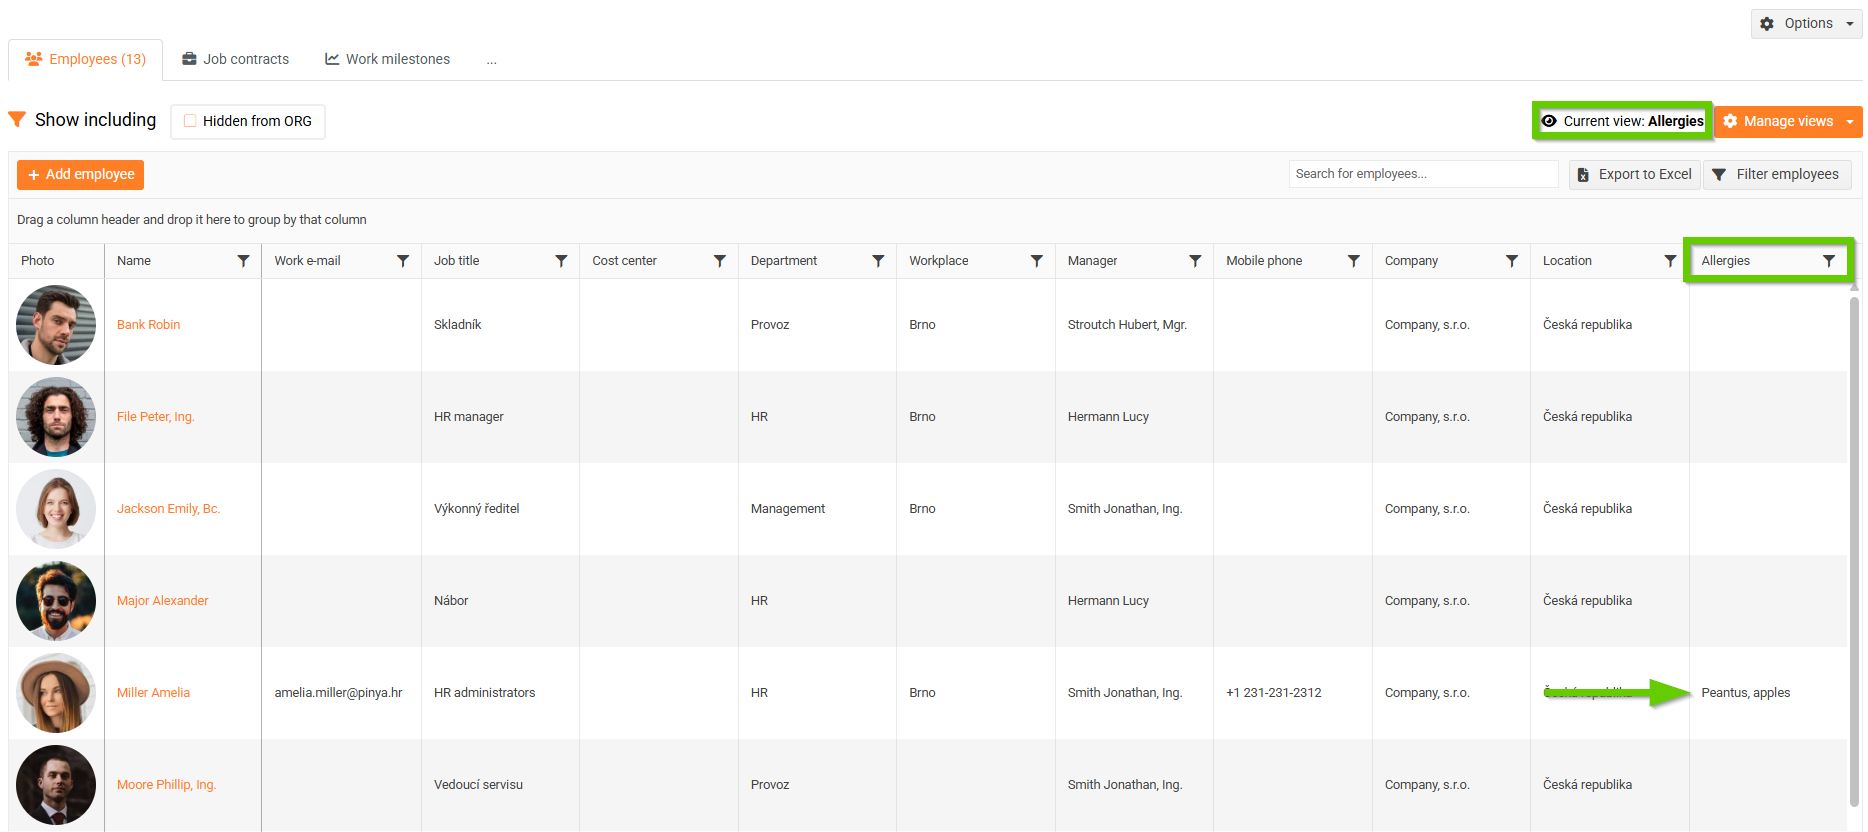
You can see information about which view is currently set in the employee list next to the Manage views button.

To add a new view, click Manage views > Add new.
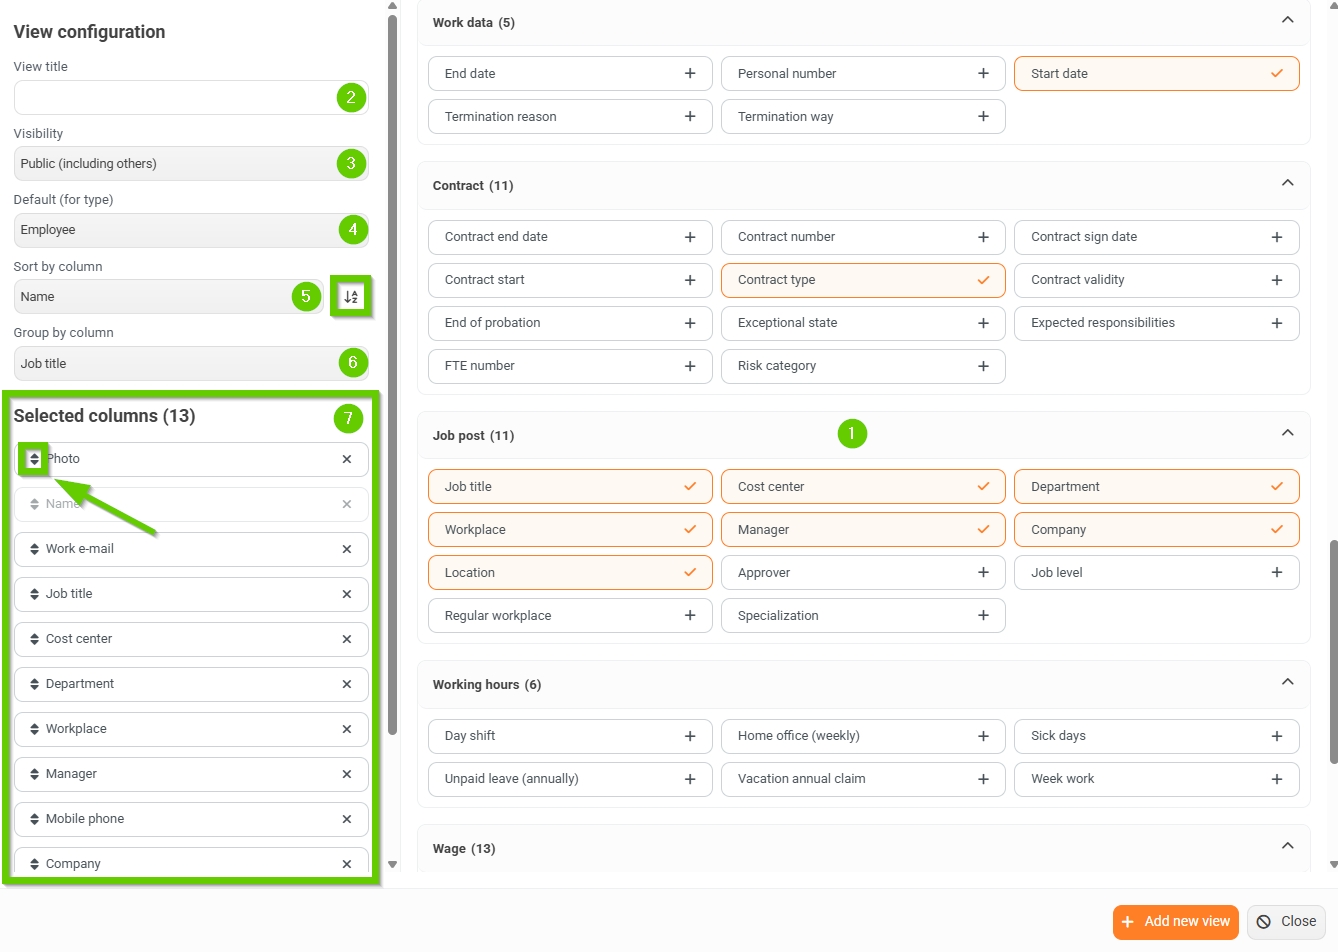
In the open window:
- select the columns you want to display in the employee list - the "Name" column is required and cannot be removed from any view. The selected column will be highlighted in orange.
- add the name of your view
- set the visibility of the view (public/private) = for whom the view will be available
- If you select the Public (also for others) option, the view will be visible to all users who have access to view management. At the same time, the option to set Default (for type) will also appear - see point 4.
- set the view as the default for your selected permission level - CAUTION: not to be confused with the Default View, which is preset by default.
- Set grouping by column - specify which column you want to use to group the data in the view.
- Define the order of the selected columns - click the arrows next to the individual columns in the list and drag them into the desired order.
- save - Add new view button.
Once added, the new view is automatically applied.
2. Modifying an existing view
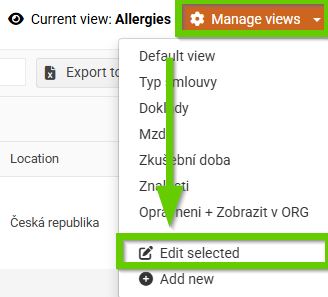
You can view all created views in the view list - click the Manage views button.
If you want to edit any of the views, click the Manage Views button and select the desired view.
Once the selected view is "on" - it appears as the current view, click Manage views > Edit selected again.
Make the desired changes and save.

3. Deleting a view
To delete a view, proceed as if you wanted to edit it - select the desired view, then click Manage views > Edit selected. Then, in the opened window, click the Delete button.
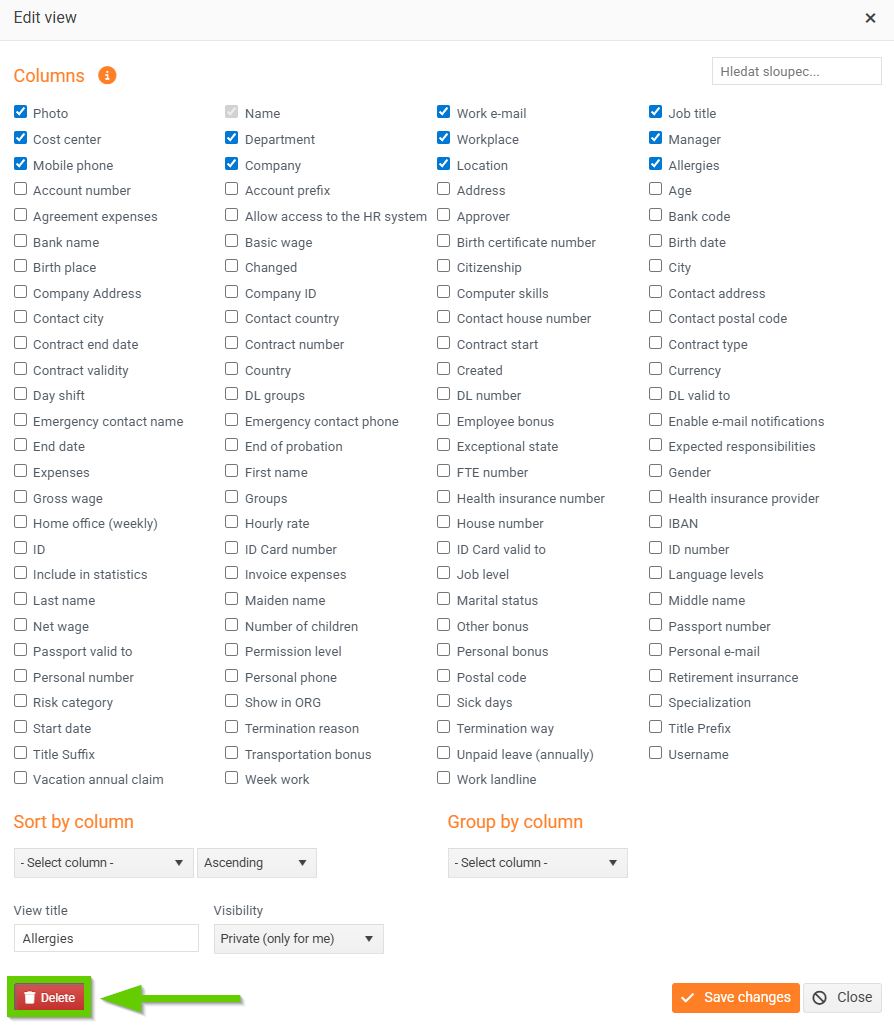
A warning will appear. After confirming, the view will be deleted.
4. Permissions for custom list view
Only users with the Personal grid view permission have access to manage views.

Users who have the switch turned on:
Viel all
- can see all public views already created and can use them to display the list
- they cannot add a new view, nor edit or delete an existing one
Add
- can add their own views
Edit
- can only edit their own views
Delete
- can only delete their own views